Overview
A brilliant arduino-compatible way to tell people off
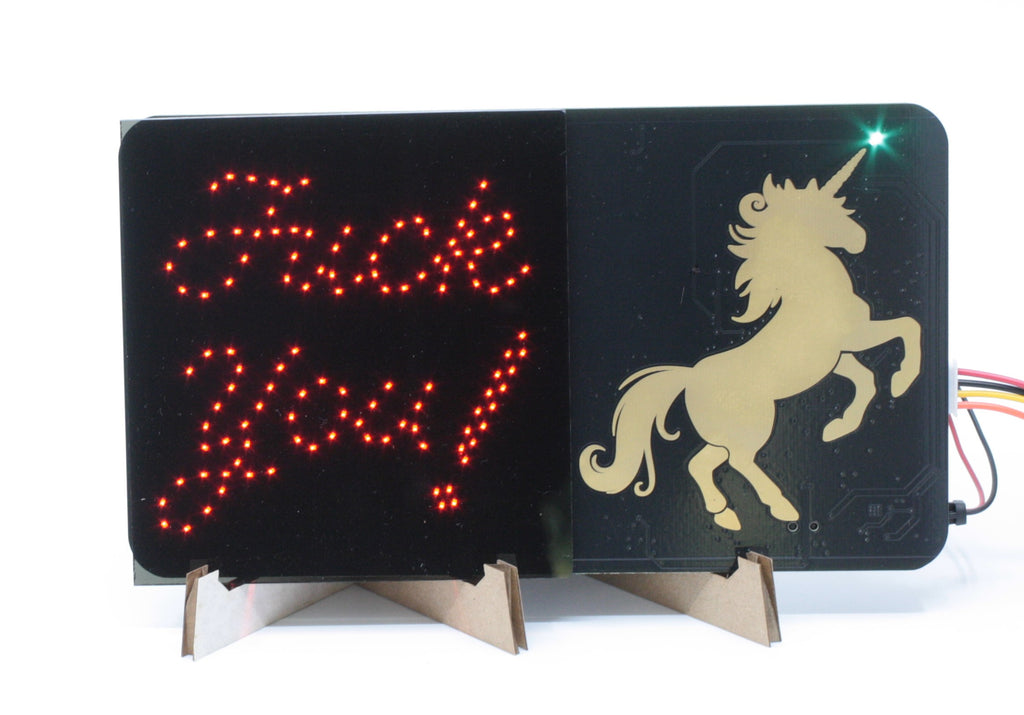
It's a unicorn with a special message. The base kit activates the message by touching the unicorn, and needs to be plugged in to work (you'll need to provide your own USB power or 5-12V power supply).
The base kit includes:
- The majestic FUnicorn circuit board
- A piece of dark smoked acrylic to obscure the LEDs when unlit
- A cardboard stand
- A beautiful rainbow USB cord
- Stickers
The full kit includes:
- Everything in the base kit
- A Big Red Button kit (everything you need to add a large arcade button)
- A battery cable, 9V battery not included
- A Distance Sensor kit (distance sensor, cables, and stand)
- Headers for the arduino shield pattern
- An FUnicorn magnet and more stickers
The code that ships with the FUnicorn activates the message by either touching the unicorn or pressing a button (provide your own or get the full kit). It can be put into a low power mode for operating off of battery power by pressing and holding the button for the duration of one of the message cycles. The message cycles through 5 different fun blinking patterns.
I originally made it as a white elephant gift exchange gag, but thought that this really had to exist in the world as a thing people could buy. So I made it arduino-compatible and developed libraries for it, and added a shield pattern to the back. I don't know about you, but I'm much more interested in learning new skills when a project speaks to me, so I'm hoping this will inspire people to learn how to do basic embedded programming in the Arduino IDE.
It's a pretty big board at 4" x 7", a nice size to proudly display on your desk. It has a majestic unicorn on it with **real gold** plating. There's an unusual cyan-colored LED on the tip of its horn that adds to the magic. There are 120 red LEDs that spell out...the thing that it says... in cursive. So don't worry, your kids probably won't be able to read it anyway. There's a custom-designed cardboard stand that also holds a piece of smoked acrylic in front of its special message, so it's hidden until activated. And I found amazing rainbow USB cables, which really tie it all together. It's also completely made in the USA. This is also an explanation as to why it's not cheaper. The size of the board, the number of LEDs, and the fact that it's US-made in a relatively small quantity make it cost more.
There are 120 LEDs soldered in place to spell out its beautiful message in classy-ass cursive. Although it's a one-trick pony and you can't change what it says, the possibilities of how to trigger the message are endless. There's an arduino shield pattern on the back, so you can solder on the headers (or wires) and add practically any sensor to it. Want to make a "6 feet, mofos" sign? Add a distance sensor and/or a motion detector. Want to tell someone they're being too loud? Add a microphone. Want to simply keep track of how many times you've told people off? Add an LCD shield.
BASE KIT:
Unpack the components from the box.
The headers are to make it easier to hack into your FUnicorn. We reccomend you don't solder them on unless you're planning on using them!

Slide the 3 cardboard pieces together to make the stand

Set the FUnicorn board on the stand

FULL KIT:
Unpack the components from the box.
(9V battery not included)

Full Kit Setup:
Assemble the Big Red Button Kit per its instructions HERE
Plug the Big Red Button into the FUnicorn board


Base Kit Use:

Note: You must wait for the pattern to finish before you can trigger the next one!

Full Kit Use:


