Big Red Button Guide

Overview

Add a Big Red Button to any project with this handy kit! Includes 60mm arcade button with LED, box, cable, and stickers.

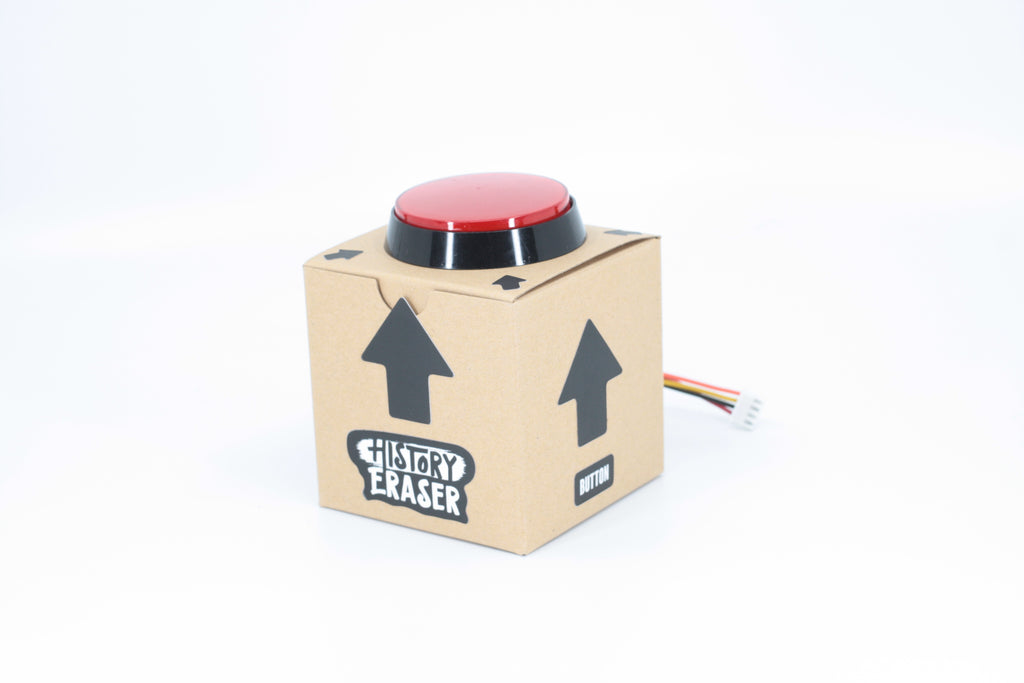
Providing an easy way to add a Big Red Button to any project, no soldering necessary!  The kit includes:

- 60mm illuminated big red arcade button
- Cable with quick-connects for the button side, and a JST XH 4-pin connector to interface to your electronics
- 3x3x3" cardboard box for a button enclosure
- Sticker sheet which includes cutout templates for the box, and fun History Eraser and arrow decals
- Screws and a grommet if you want to 3D print our plastic enclosure

​Arcade buttons are awesome, but they're deep and it's hard to find an enclosure that will fit them.  We thought we'd solve that problem and make it easy for anyone to add a stand-alone supremely mashable button to any project.

$
9.95
 
$

Insert the switch into the switch holder.

We find it easiest to insert the post nearest the LED into the corresponding hole on the switch first, then pull out the other tab while swinging the switch around and snapping it into place.

Push the quick connect receptacles onto the blades.

The larger ones (0.250”) attach to the LED blades, the smaller ones (0.187”) attach to the switchblades. Note that COM is the blade on the bottom of the switch, and you can choose whether to attach the second one to either NO (normally open) or NC(normally closed).

Place the LED into the LED holder

*Make a note of which leg the flat side/cathode of the LED is contacting. You’ll need to know this later when connecting the button to your project.

Unscrew the nut from the button.


Place the “cutout” stickers on the cardboard box


Cut around the outline of the stickers with a sharp exacto knife.

There will be the circle with ears on the lid, the two semi-circles on the flaps, and a small rectangle at the bottom of the back side of the box.

Place the button through the lid of the box, and attached with the nut.

(Note the photo does not show the switch or cable.)

Insert the switch & LED assembly into the button.

Note that there’s an L-channel on two sides of the switch/LED assembly, line those up with the two black tabs on the button, push in slightly to compress the spring, and twist. It should snap into position relatively easily.

Align button with top cutout

Fish the connector at the end of the cable through the square cutout in the bottom of the box. Then close the box lid.

Sticker it Up!

Add the Big Red Button to your FUnicorn!

If you didn't get the Full FUnicorn kit you can buy the Big Red Button Seperatly and follow the instructions to add this feature to your FUnicorn

Turn your Buttons into a Simon Says Game!

Add the adhesive pin onto the battery holder so you can wear you badge!

Backstory

Almost every project can be improved by adding a big red button to it. But it's not as easy as you might think! 60mm arcade buttons are very long and require a deep enclosure. Well, no more! This handy kit uses a cardboard enclosure to hold the button, and comes with an awesome sticker sheet that you can use to decorate your new shiny candy-like button.

Elsewhere on the Web

Have any questions?  Contact us!