


Details
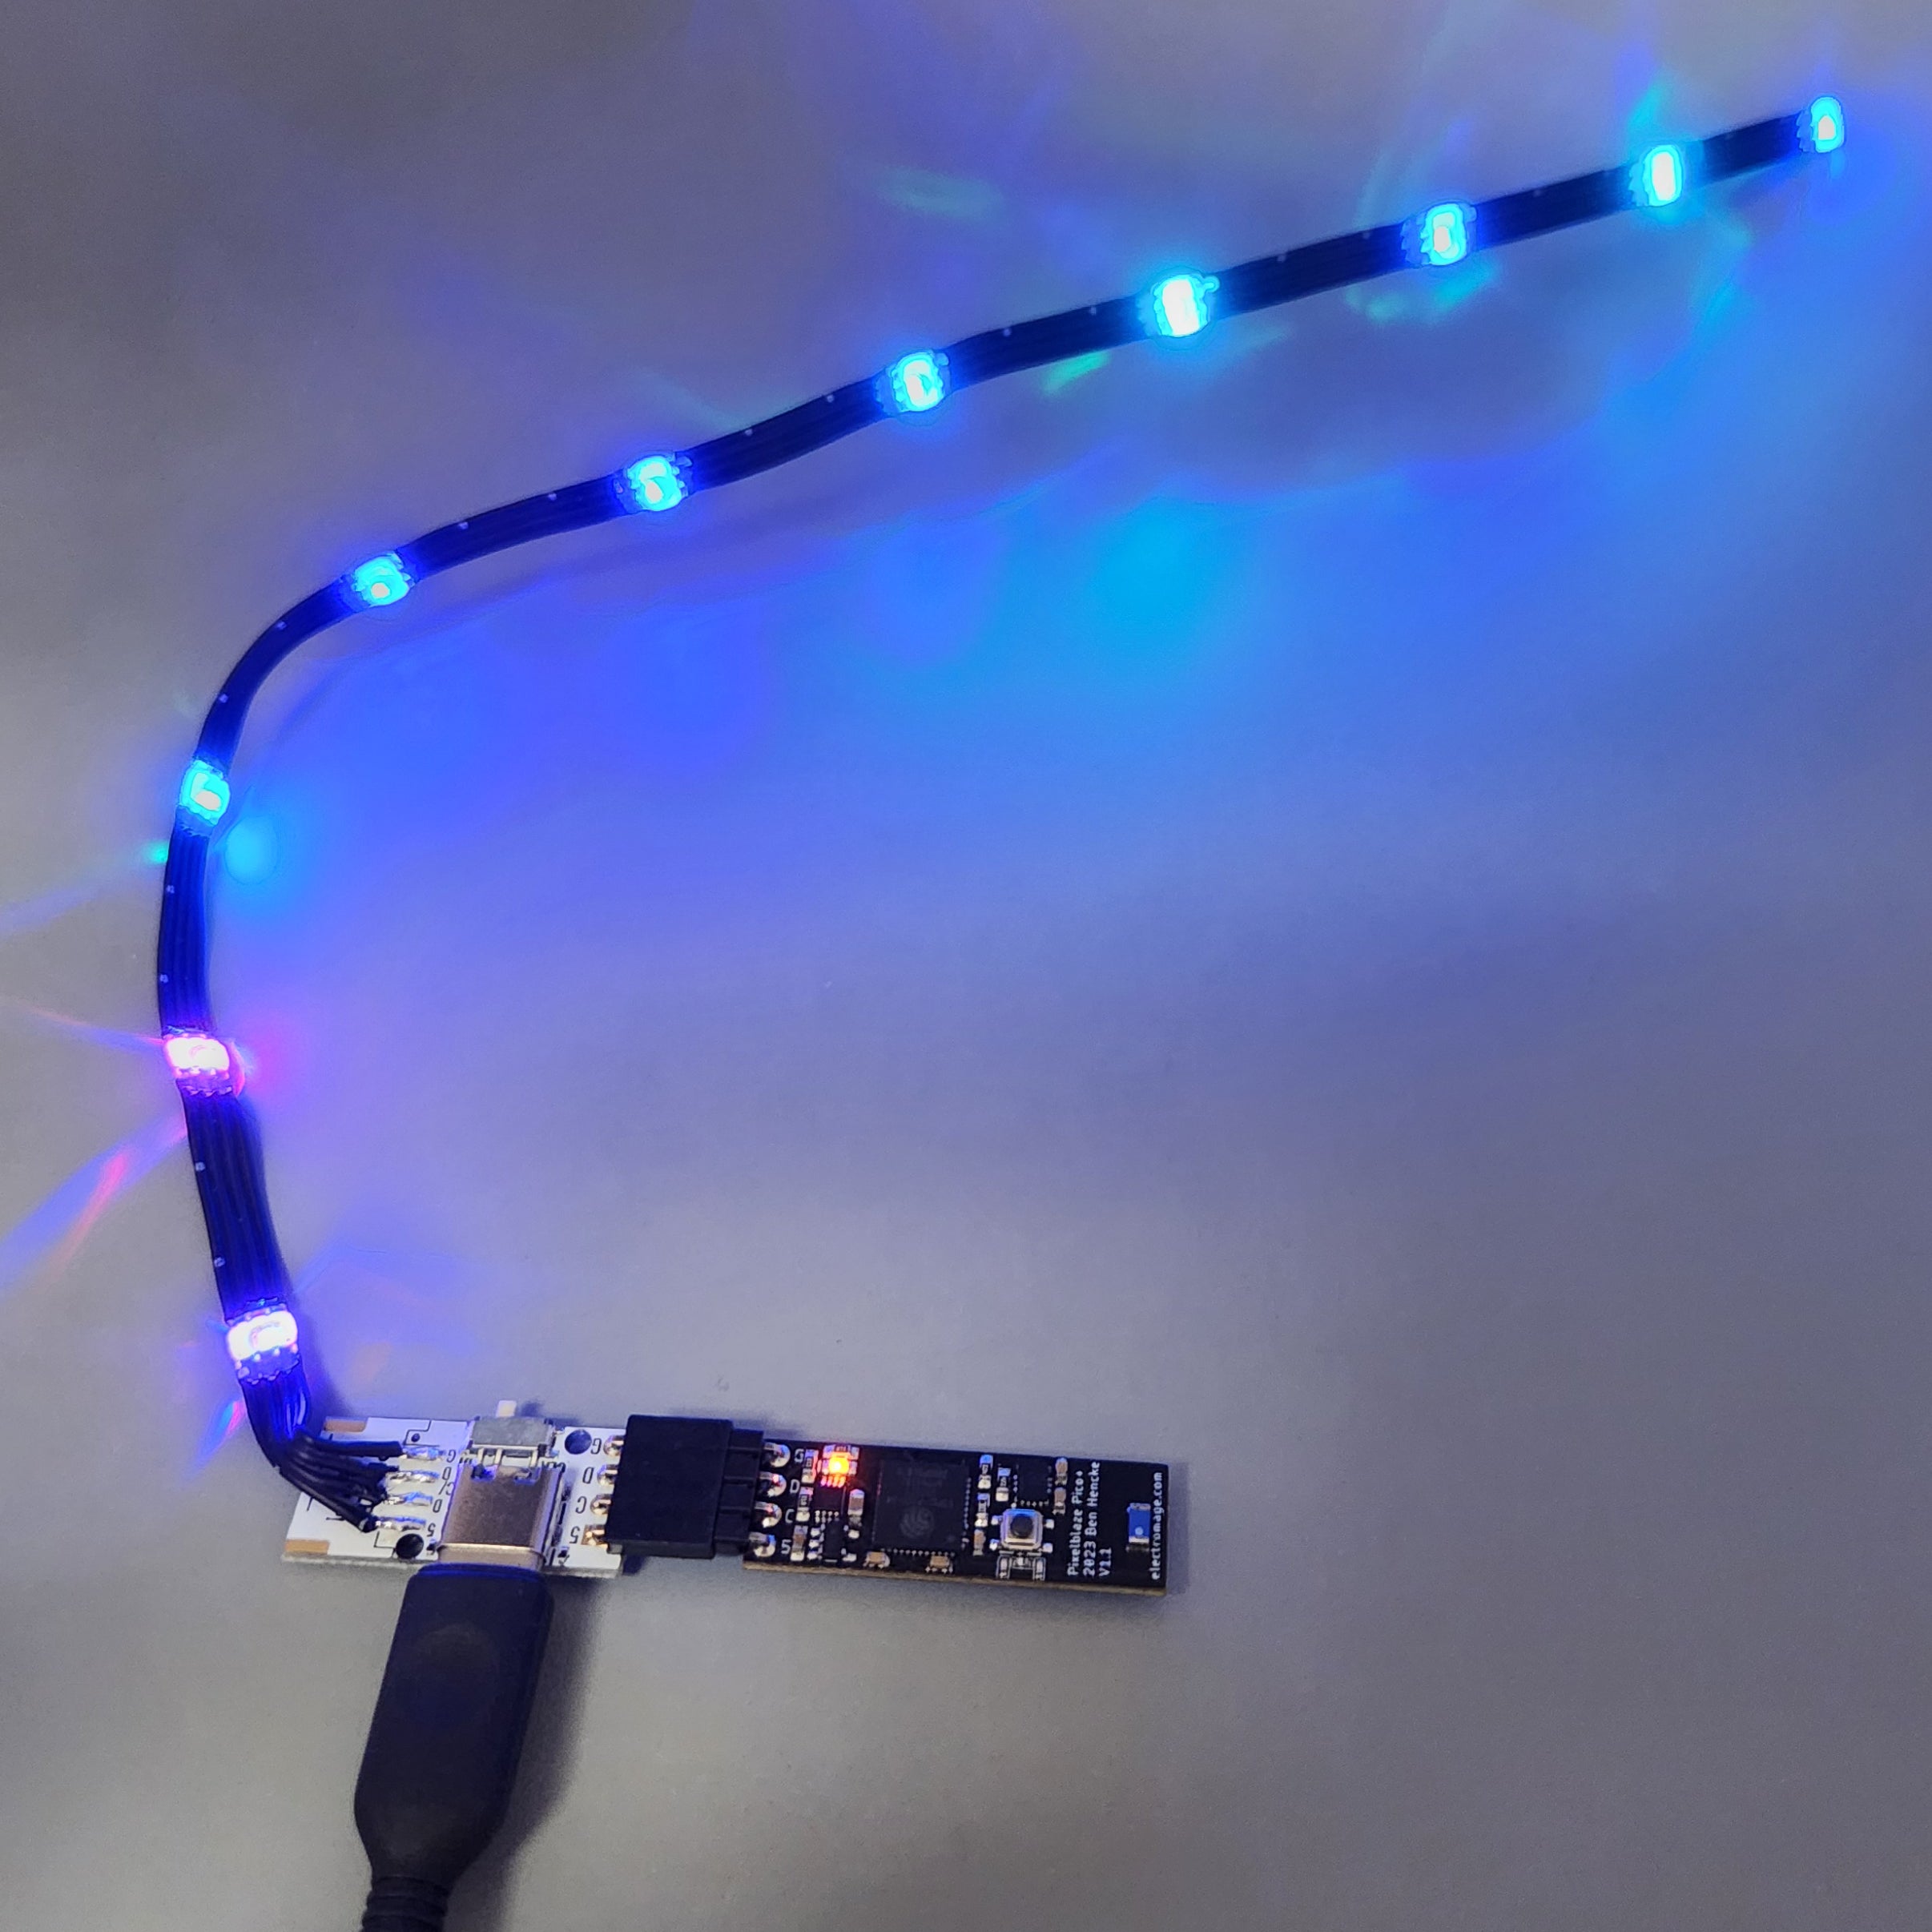
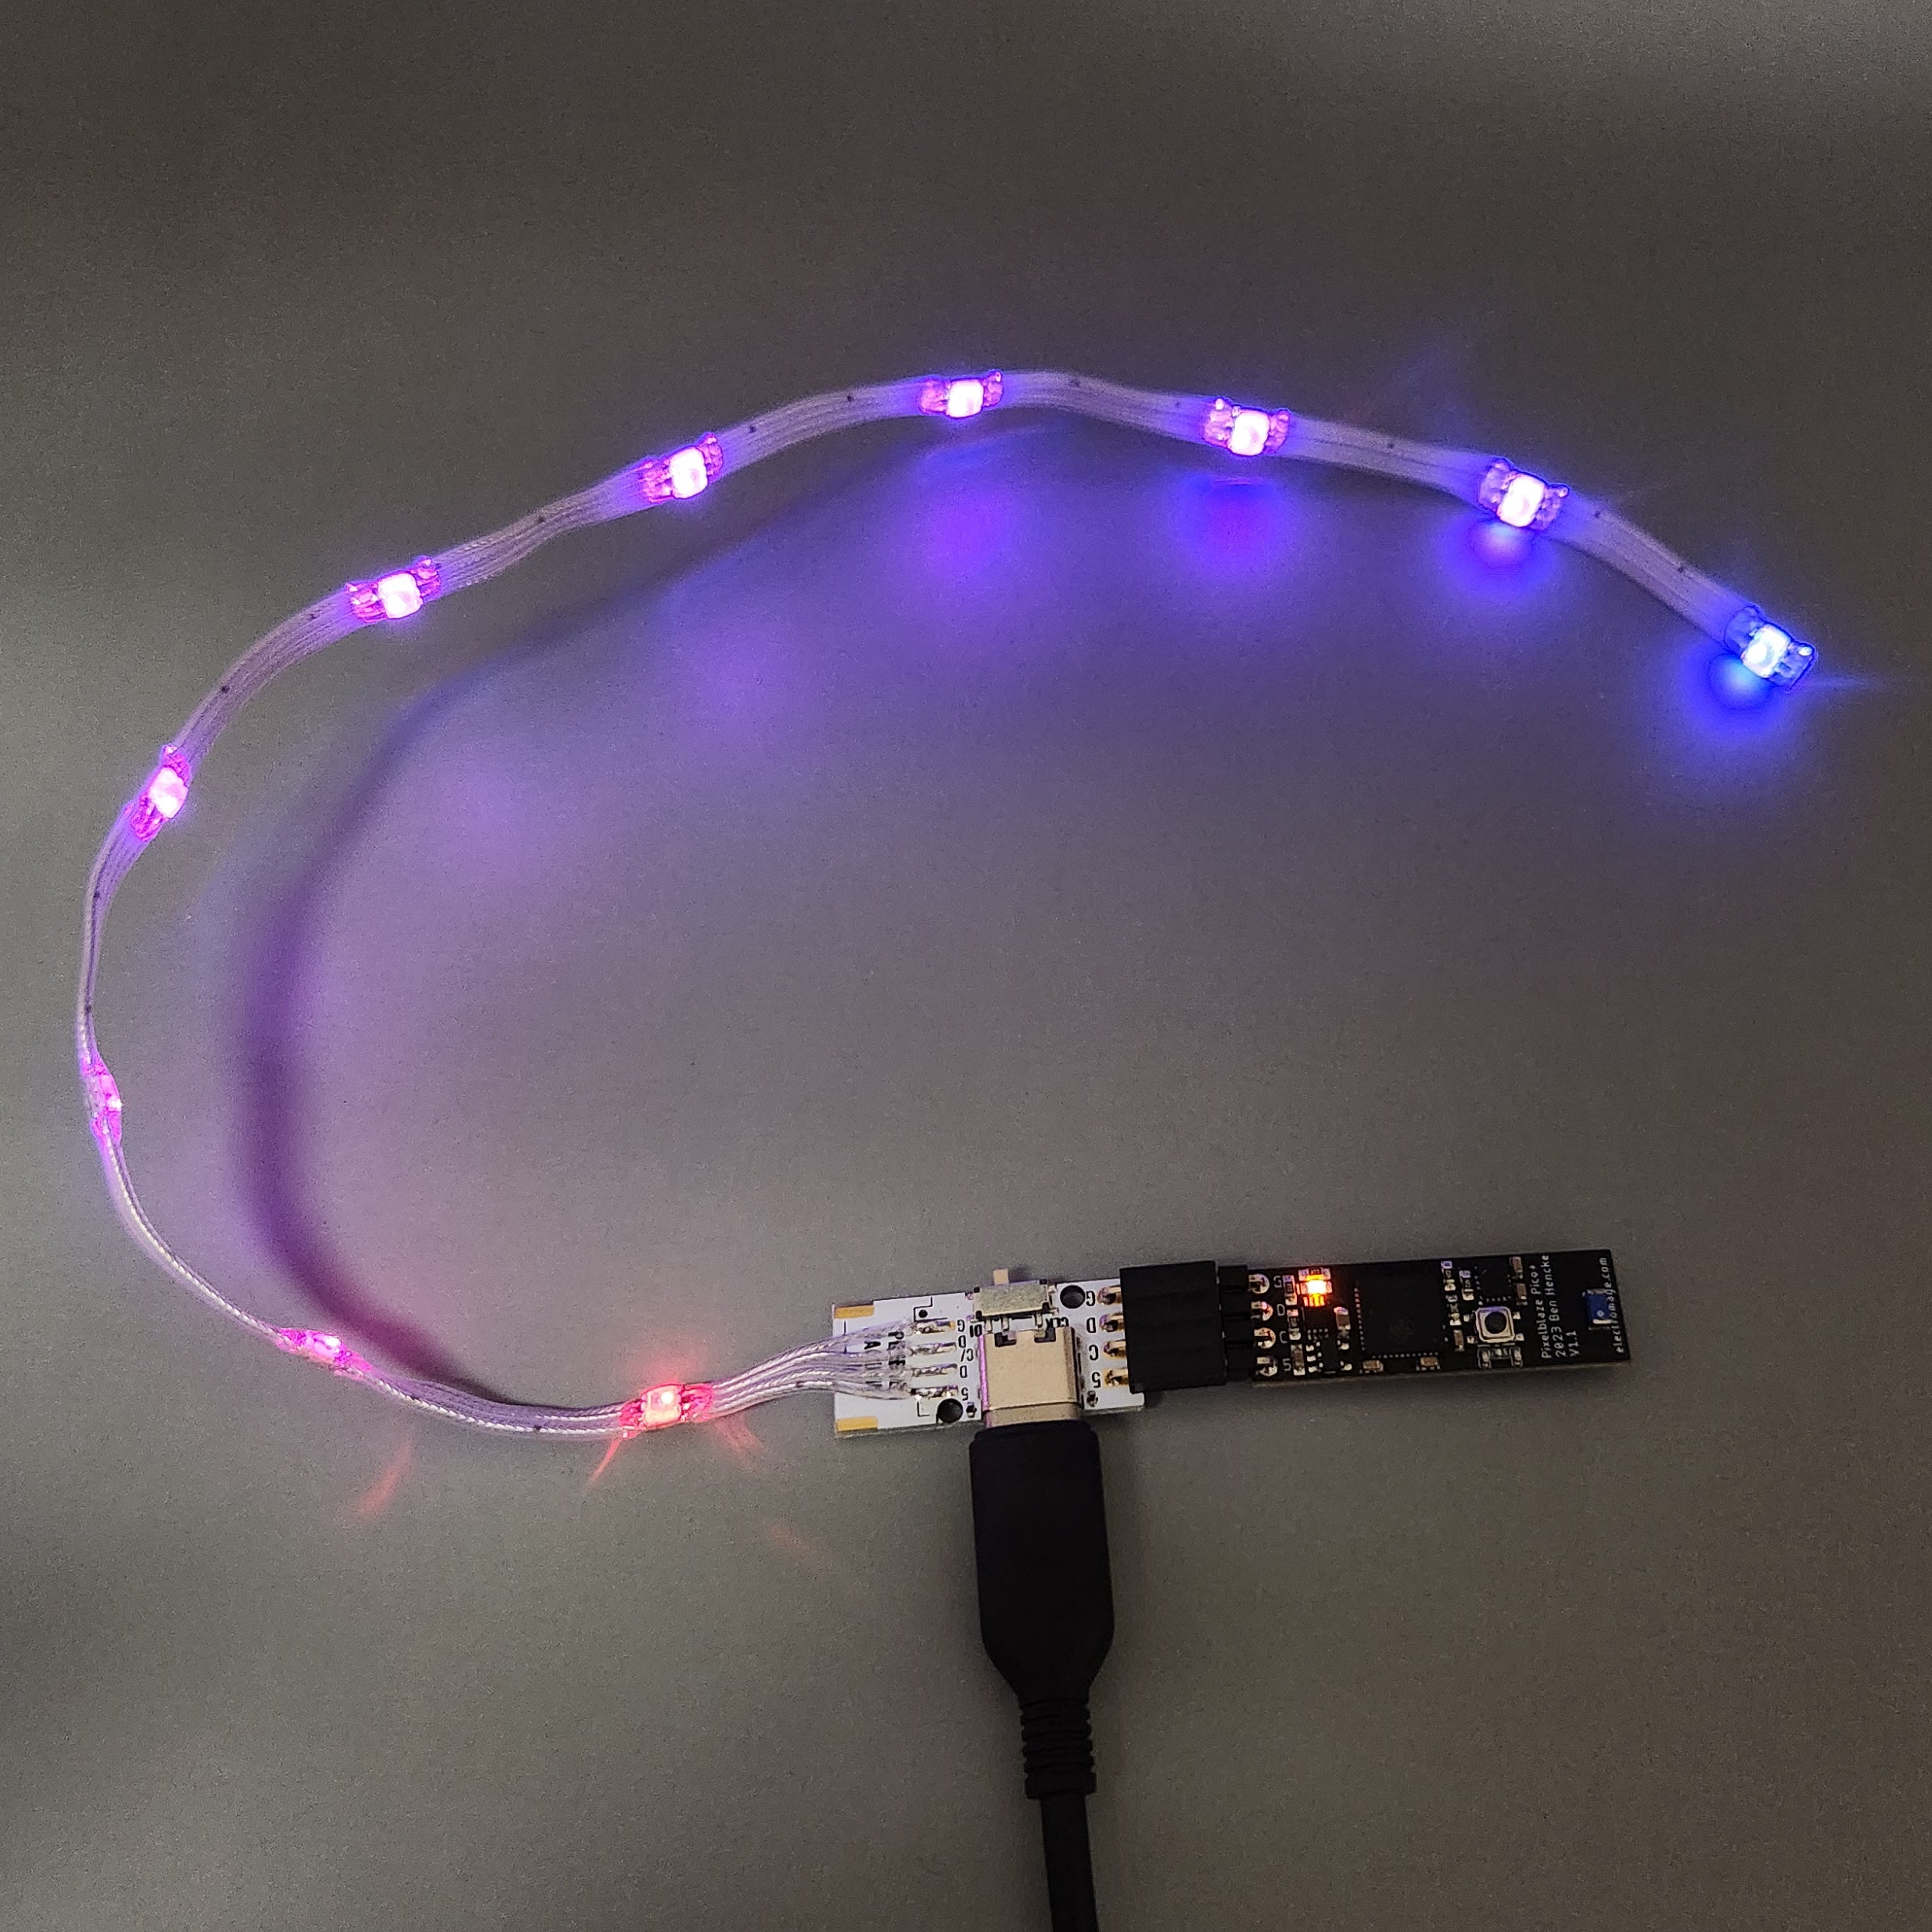
This board makes it super easy to add LEDs and USB-C power to your project. It's optimized for use with the Pixelblaze Pico LED controller and Pebble-style LEDs with Backup Data, but can be used with any controller and any* 3 or 4-pin 5V addressable LED strip, strand, or PCB object! *except Data Return style Pebbles, we have a separate Tentacle System for those!
Full guide for how to wire everything up!
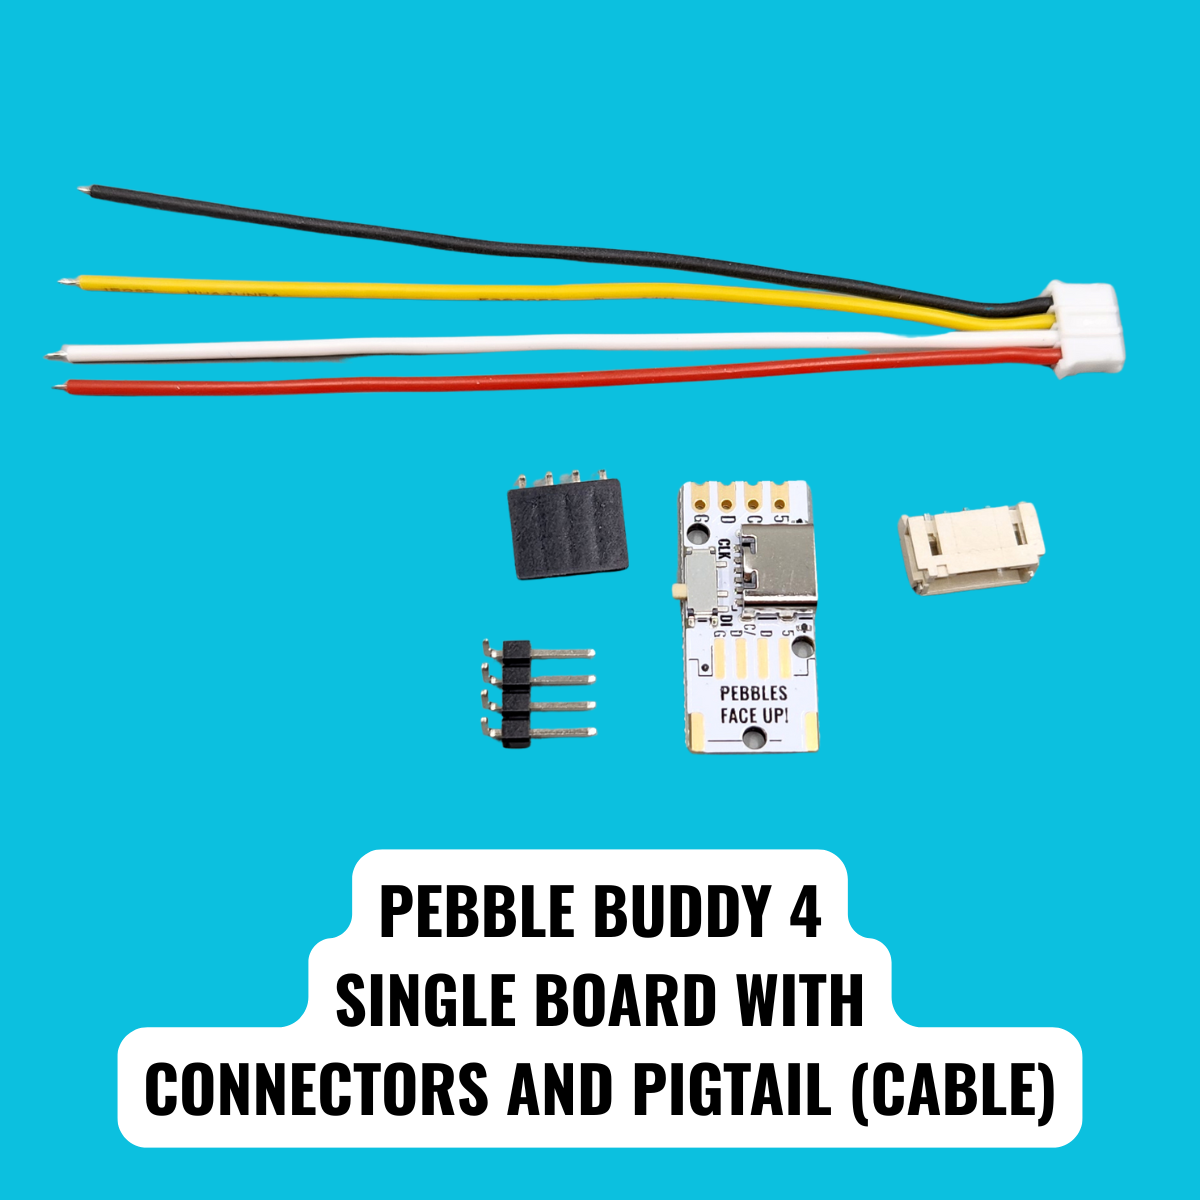
The Pebbly Buddy 4 comes with the USB-C connector pre-soldered and a bunch of optional connectors & one pigtail (cable) so that you can choose the best way to wire everything up for your project.
You can attach an LED controller in a variety of ways:
- Solder a Pixelblaze Pico controller directly to the back of the Buddy with the 4 castellated edge pads. Apply tape to the back of the Pico first to insulate exposed pads.
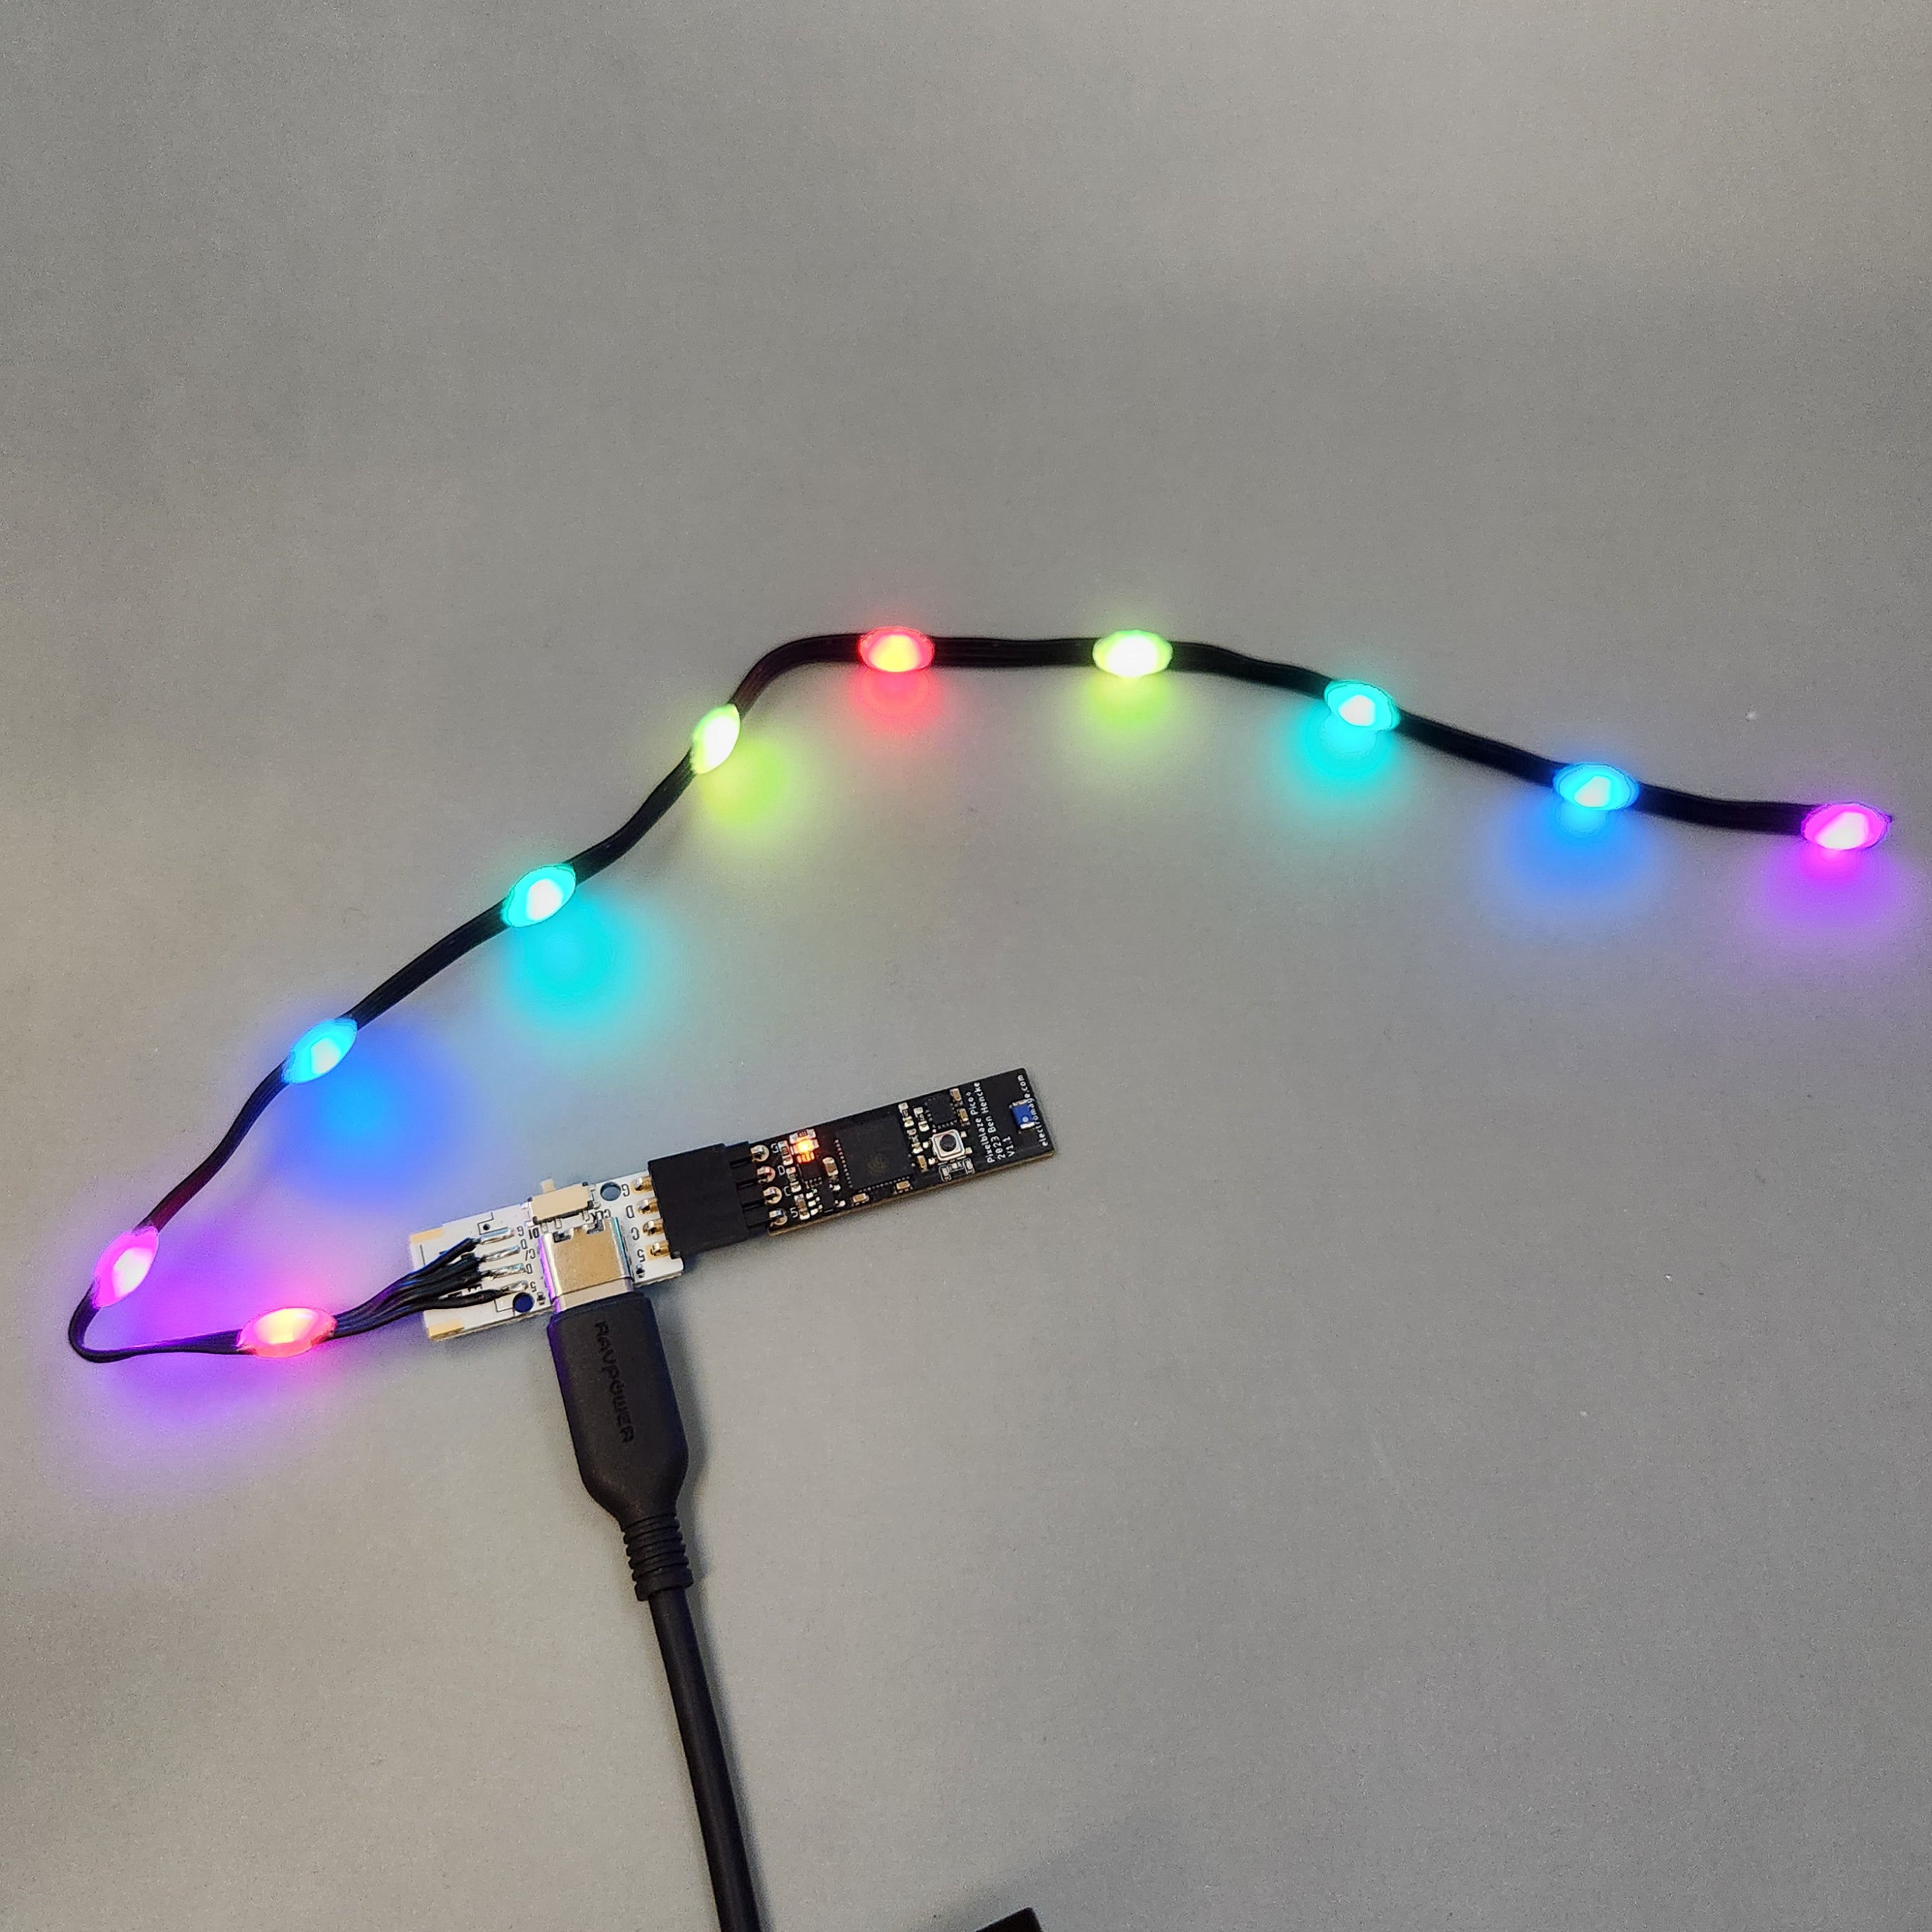
- Solder the 0.1" right angle headers to both the Pixelblaze Pico and the Pebble 4 Buddy to have a connectorized solution, and easily swap Pixelblazes between projects
- Solder wires to the through-holes and use any LED controller
- Solder a vertical header to the Pebble 4 Buddy and plug it into a breadboard
You can attach the LEDs in a variety of ways too!
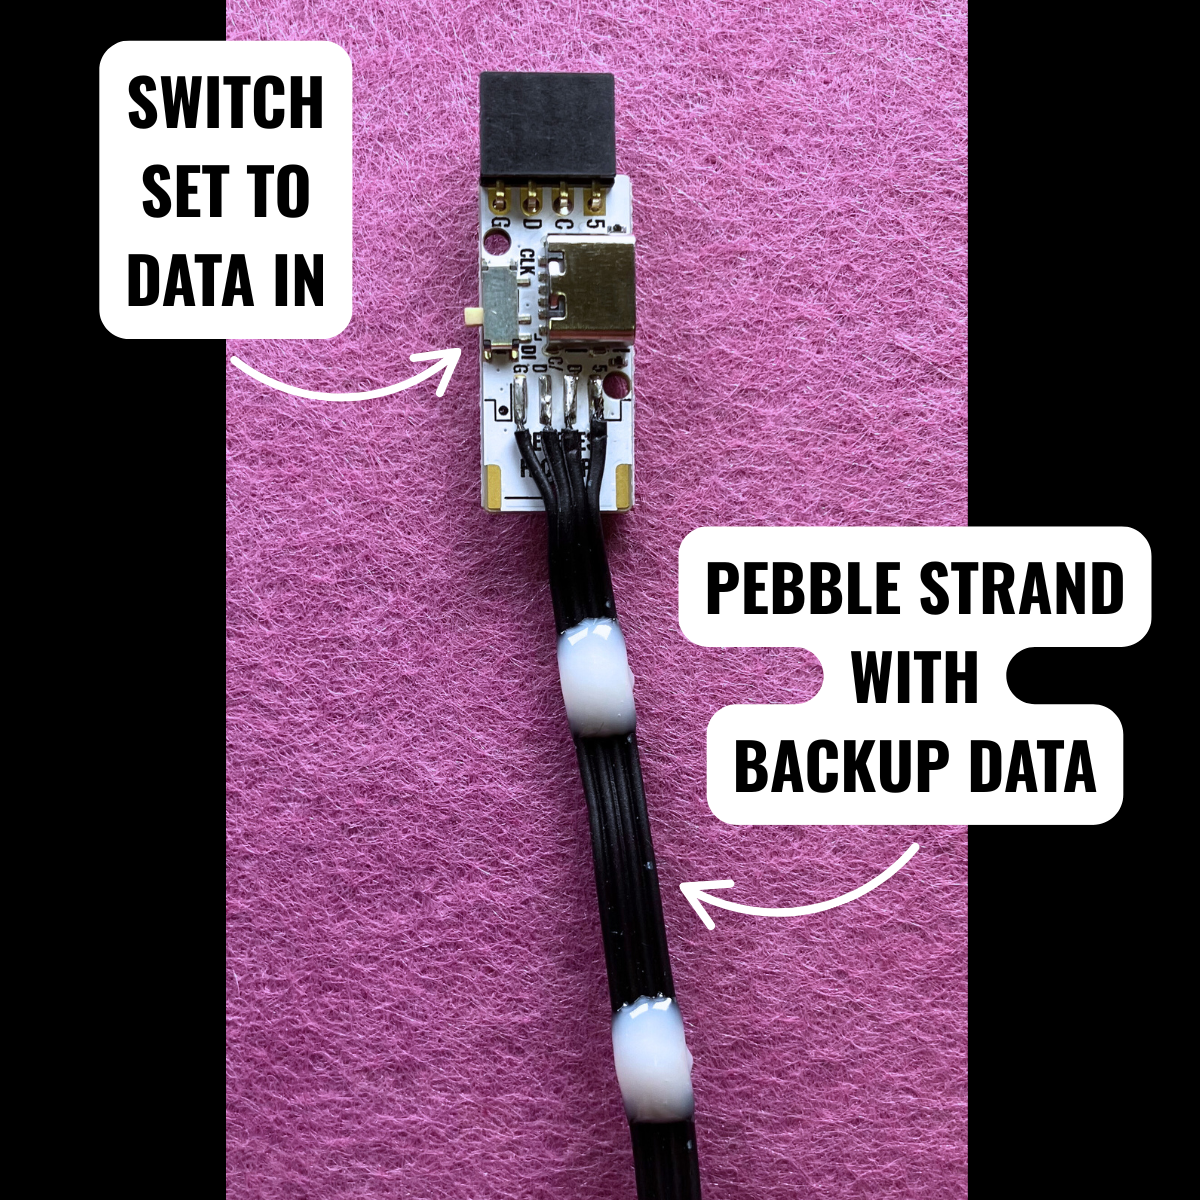
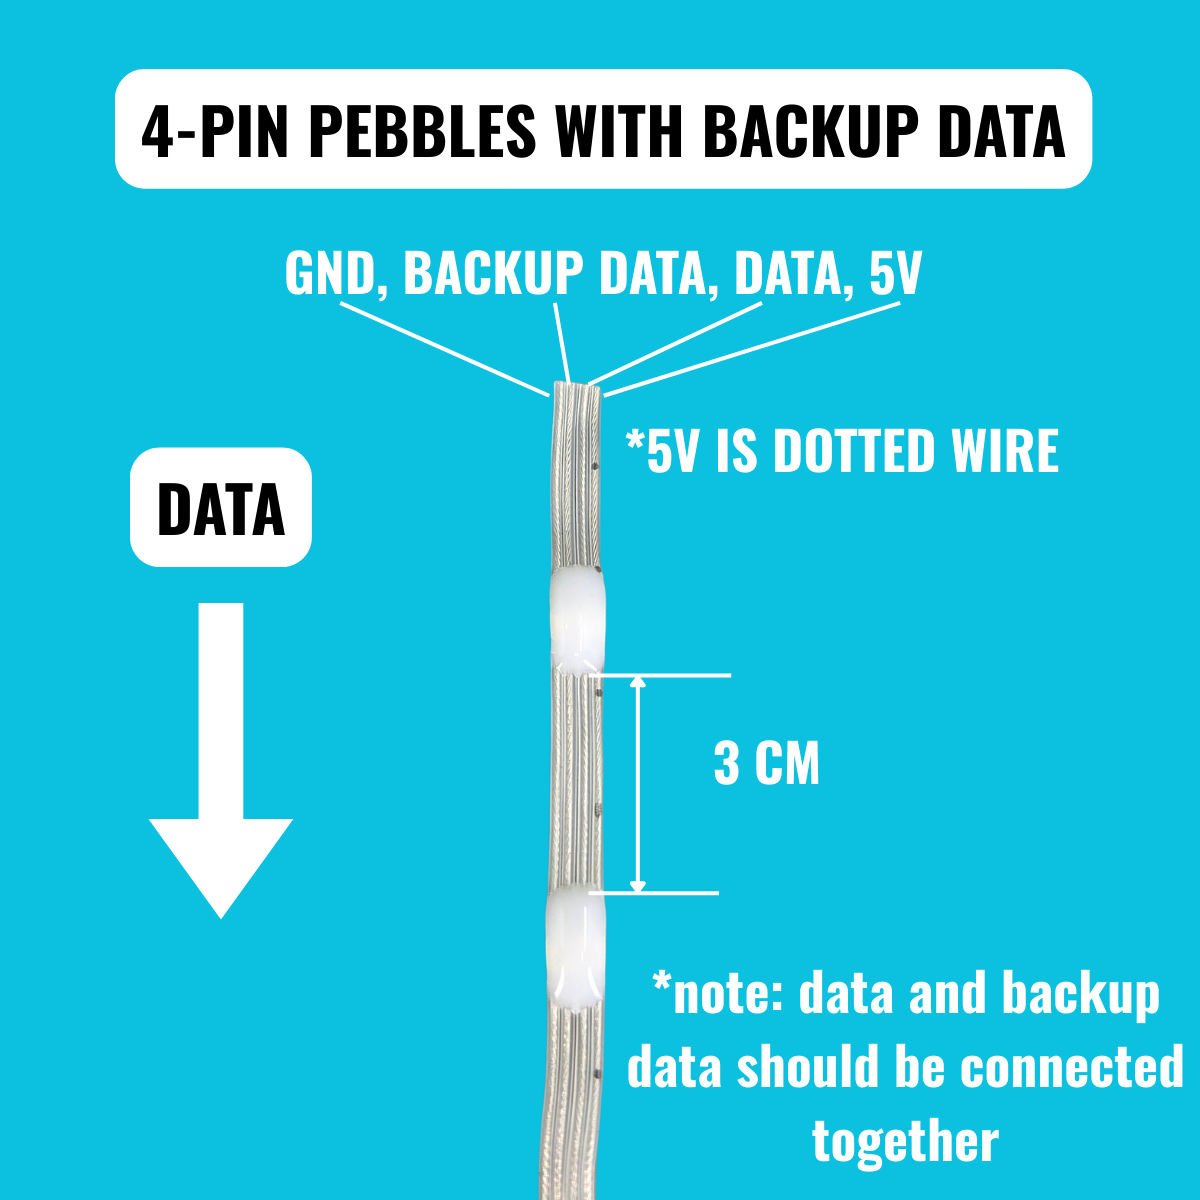
- Solder a Pebble-style strand with Backup Data directly to the pads
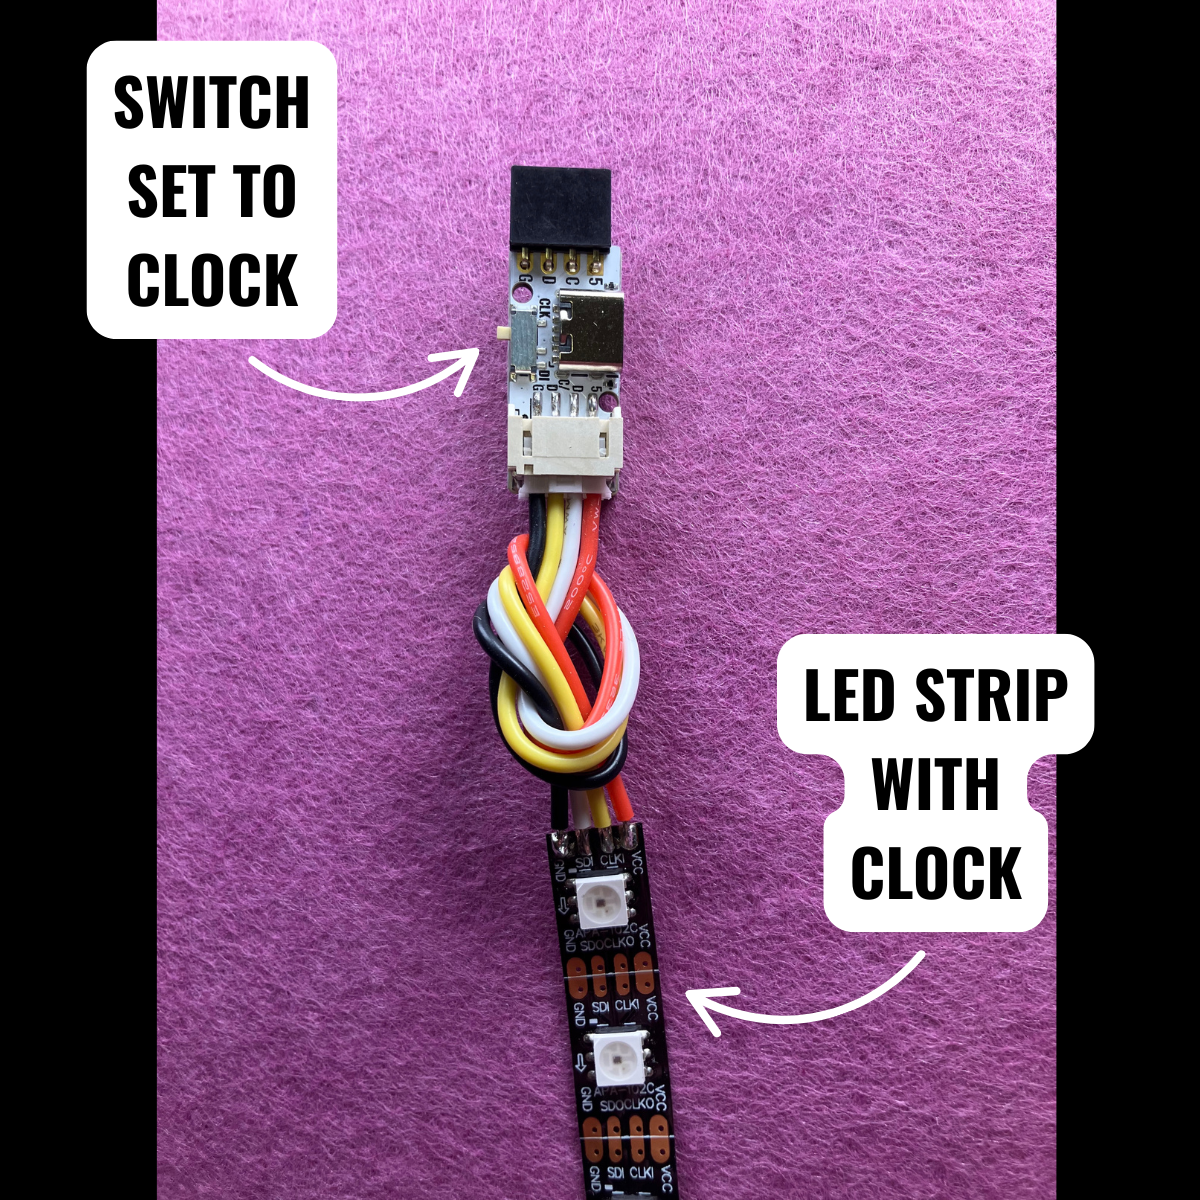
- Solder the JST connector and use the pigtail (cable) to wire up any 4-pin LED strip or object with clock or backup data.
- Or heck, use the pigtail to connect a 3-pin strip, just skip the C/D pad. Or check out our Pebble Buddy 3 which is optimized for this.
The switch changes the function of the pad labeled C/D, so you can use a strip that has a Backup Data line, or a strip that has a Clock line.
- C = CLOCK
- D = an extra DATA IN to properly set up strips that use Backup Data.