


Details
Tentacle Buddies help you wire up projects with strands of LEDs that dangle from a central ring (like tentacles) or hang from horizontal strips (like curtains). It's optimized for a Pixelblaze Pico (though they can be used with any LED controller) and for Pebble-style strands with a Data Return line. They help keep your LED data wiring tidy and compact, make connectorizing strands and controllers easy, and also feature a convenient USB-C connector for powering both the LEDs and controller. They can be used by themselves to dangle a single strand, or with Tentacle Breakouts to daisy-chain multiple hanging strands.
A full guide is in our Instructions.
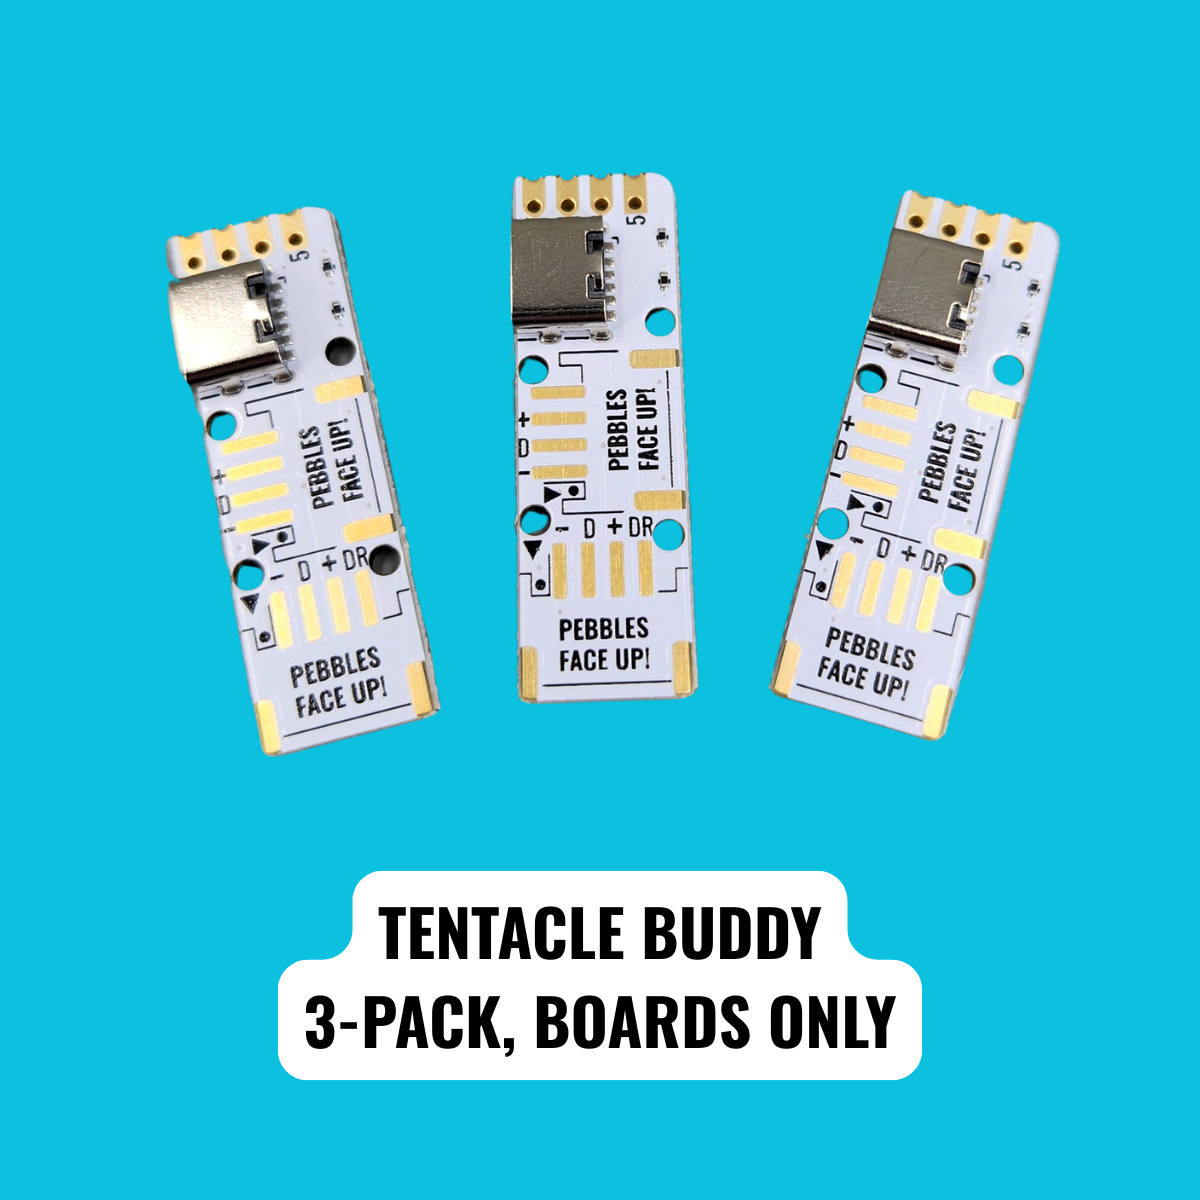
The Tentacle Buddy Board
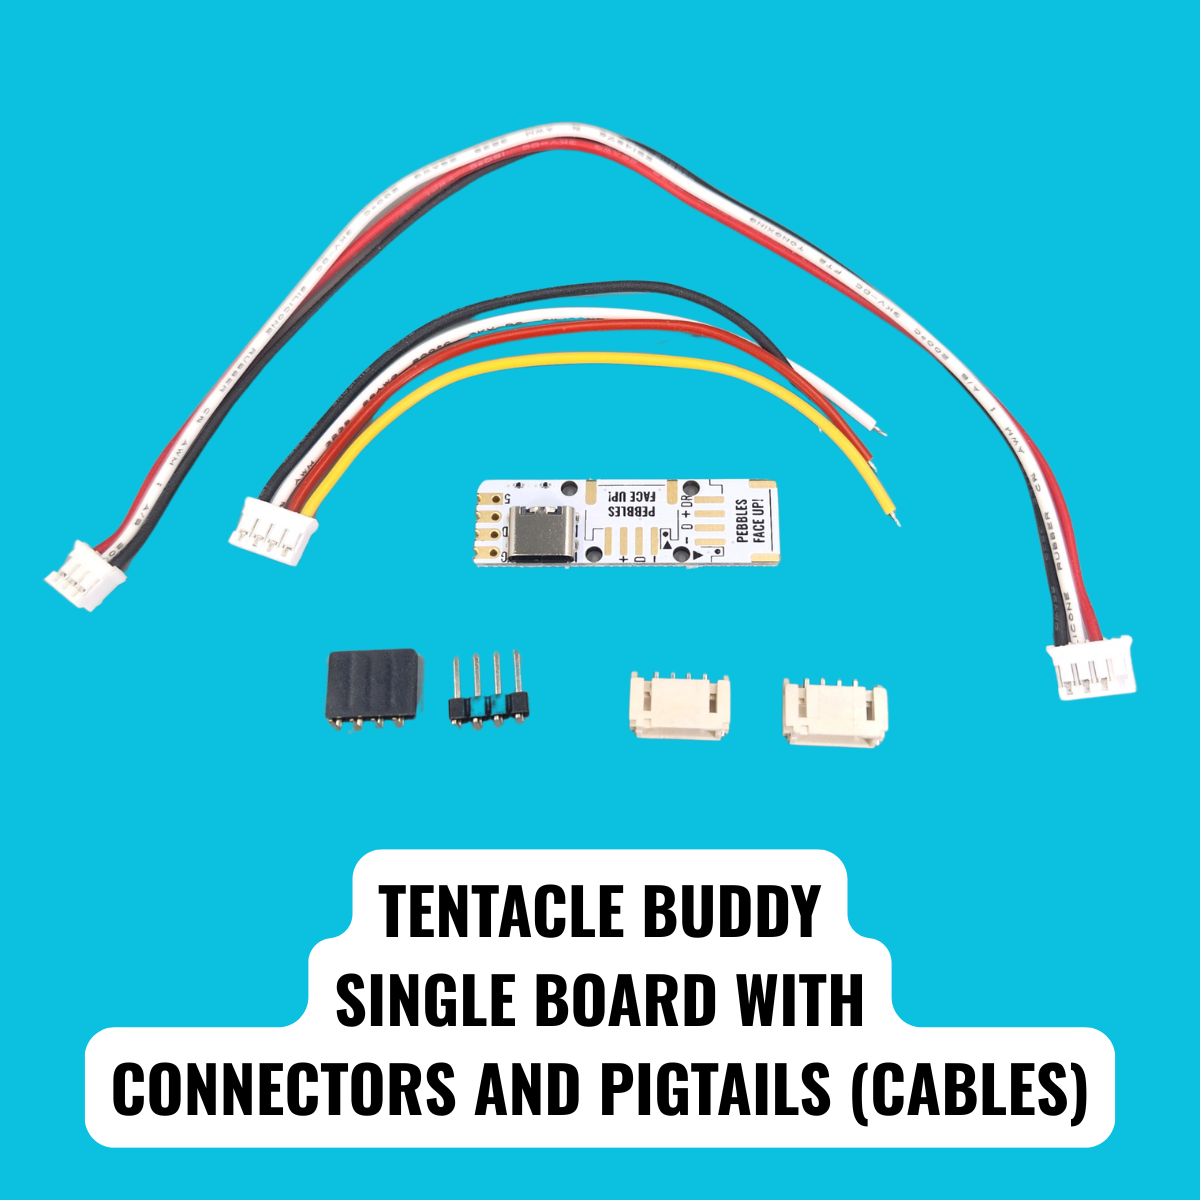
This board interfaces directly to an LED controller, breaks out power into a convenient USB-C connector, sends the LED data down a 4-pin Pebble strand that has a Data Return line, and then sends the returned data and power out a 3-pin Pebble connector or pads. It is shipped with all mating connectors, but only the USB-C connector is pre-soldered. This allows for a variety of integrations, and you can choose what best fits your project. Here are the options for interfacing with LED controllers:
- Solder a Pixelblaze Pico directly to the back of the Tentacle Buddy with the castellated edges at the top. Apply tape to the back of the Pico first, to insulate exposed pads.
- Populate the 0.1" right-angle headers on both the Pixelblaze Pico and the Tentacle Buddy and have a connectorized solution so you can easily swap Pixelblazes between projects
- Solder wires to the through-holes and use any LED controller
- Solder a vertical header to the through-holes and plug it into a breadboard
The 4 LED pads pointing "down" are for the first tentacle, or a 4-pin LED strand with Data Return line that brings the data out from the last LED back up to the board. You can:
- Solder a Pebble strand with Data Return directly to the 4 pads.
- Solder the 4-pin JST connector to the board and the pigtail to your strand, so you have a replaceable strand or a project that's easier to break down or have the LEDs removed for washing a wearable.
In both cases, you'll also solder the Data Return line and the Data Out from the last LED together at the end of your strand - this returns the remaining LED data to the board.
The 4 LED pads pointing "right" are for the next series of LEDs. You can:
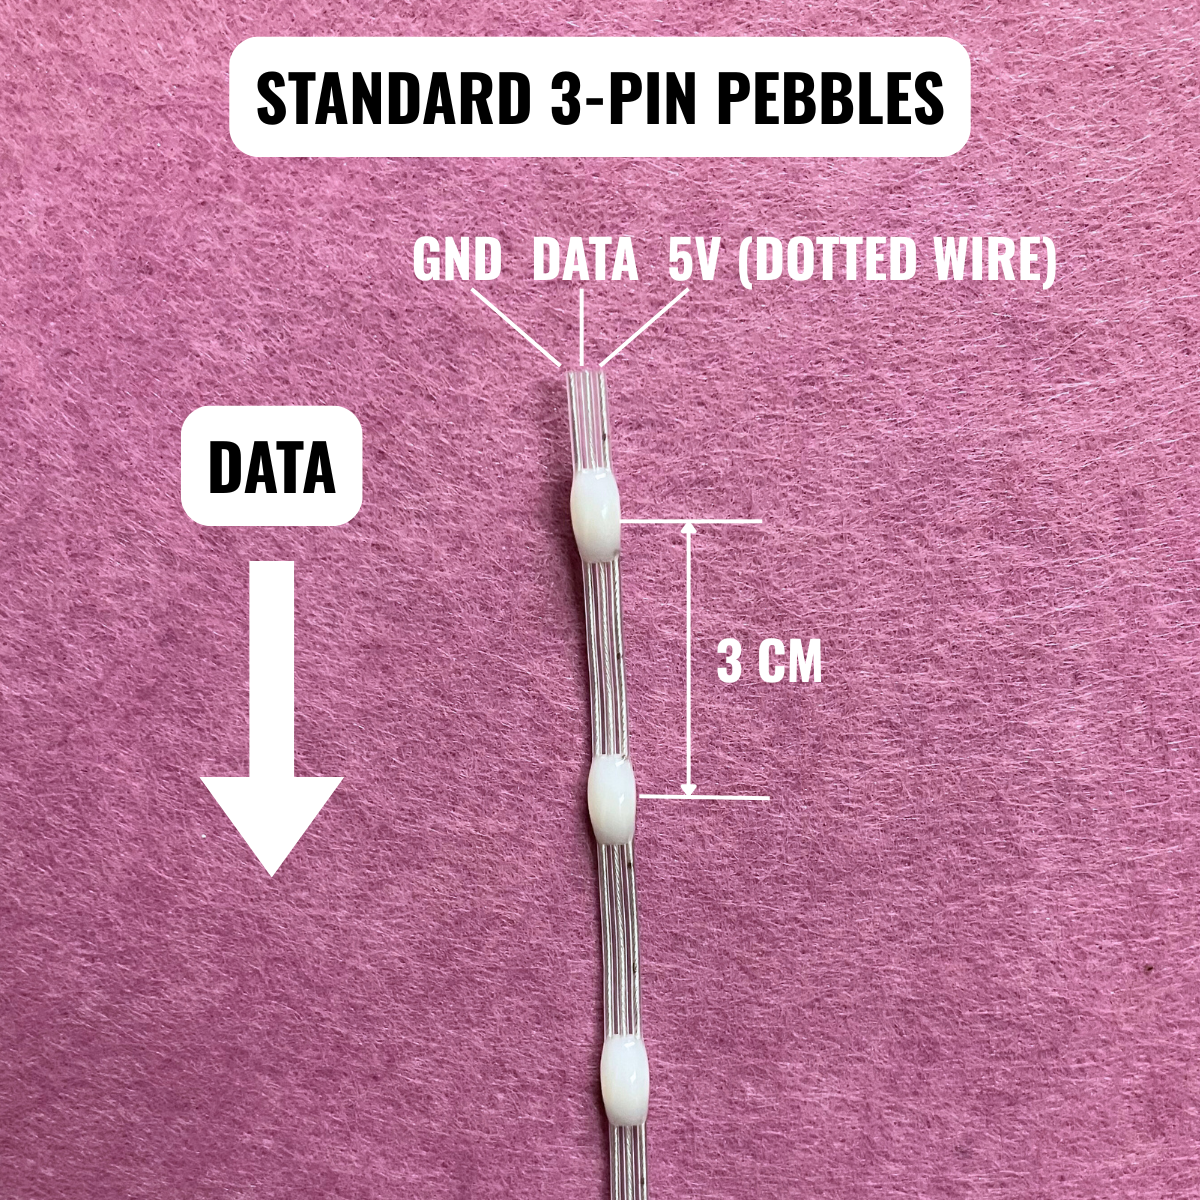
- Solder a standard 3-pin Pebble strand directly to 3 of the pads
- Solder a 4-pin Pebble strand with Data Return to 3 or 4 of the pads (you prob will not need the Data Return wire)
- Solder the 4-pin JST connector to the board and the pigtail to any strand, for the same above reasons OR for interfacing to any tape-style strip OR for carrying the LED signals directly to a Tentacle Breakout Board
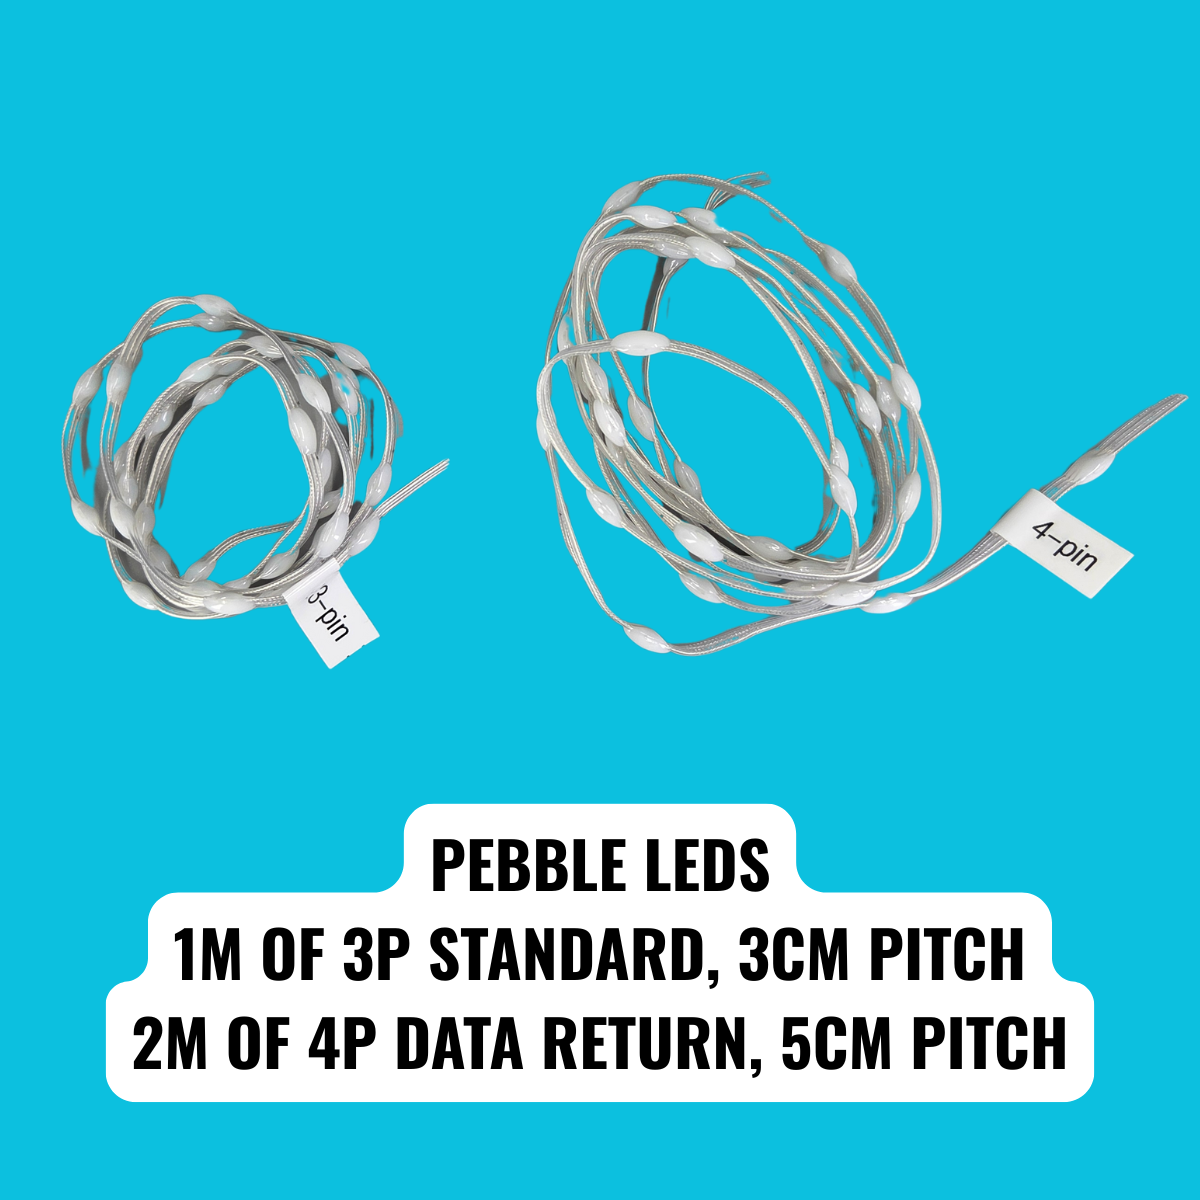
For LEDs, we're offering a little starter kit to get you going with Pebbles. It contains:
- 1m of 3-pin standard Pebble LEDs, 3cm spacing between LEDs
- 2m of 4-pin Pebble LEDs with Data Return line, 5cm spacing between LEDs